A new roof is one of the few home projects where careful planning and the right team dramatically reduce stress and expense. Whether you call a roofer to patch a leak, hire a roofing company for a full roof replacement, or schedule a roof installation after buying a fixer-upper, the work touches structure, insulation, warranty, and curb appeal. This checklist takes you through practical decisions, common trade-offs, inspection points, and contractor interactions that separate a routine job from a reliably done job.
Why this matters A poorly executed roof job shows up as leaks, shorter material life, and higher heating bills. Conversely, the right preparation and oversight deliver predictable timelines, fewer surprise costs, and a roof that serves for the expected 20 to 50 years depending on material. I’ve seen small oversights—missing drip edge, mismatched ventilation, or a vague payment schedule—turn into expensive callbacks. The goal here is to make those oversights visible before the crew arrives.
Before you hire: clear priorities and realistic budget Decide what matters most: low upfront cost, longevity, appearance, or energy performance. Asphalt shingles remain the most common choice because they balance price and durability—expect 20 to 30 years from midgrade architectural shingles, 30 to 50 years for premium blends. Metal roofs cost more upfront, often two to three times a shingle job, but they can last 40 years or more and shed snow well. Clay, slate, and tile have the longest lifespans but require structural assessment because of weight.
Set a budget range with room for contingency, typically 10 to 20 percent. Roof replacement expenses vary widely by region and house size, but a reasonable homeowner estimate is $5,000 to $15,000 for an average single-family home using midgrade shingles. If quotes fall well outside that range, ask why; differences often come from tear-off cost, number of layers, decking replacement, or ventilation upgrades.
Choosing the right contractor Hiring the right roofing contractor or roofing company is the single most important decision. Interview at least three contractors. Ask about licensing, insurance, past work, and whether they will use employees or subcontractors. Insist on a written proposal and a timeline. Beware of door-to-door estimates after storms; those are not always fraudulent, but they often lead to rushed decisions.
Request these items in writing: full scope of work, permit responsibility, materials brand and color, ventilation plan, underlayment type, flashing details, cleanup plan, timetable, payment schedule, and warranty specifics. A good roofer will explain why they recommend certain underlayment or ice and water shield and will document where they will replace decking. Roofing contractors should be willing to show proof of insurance that lists your state and name as additional insured if you ask.
Anecdote: I once scheduled a roof replacement only to discover mid-job that the contractor had not planned for replacing rotted decking under the chimney area. That added unplanned time and cost. The contractor was reputable but the initial inspection missed soft spots. A more thorough pre-bid inspection would have saved hours of negotiation and stress.
Pre-installation checklist Use this five-item checklist before the crew arrives to avoid common disruptions.
Permit, driveway access, and neighbor notification: confirm who applies for the permit, clear parking and staging areas, and let neighbors know about noise and when large trucks will arrive. Clear the work area: remove breakables from attics and rooms below, take down wall art near exterior walls, and secure outdoor items that might be damaged by falling debris. Utility and landscape protection: mark underground sprinkler heads, low-hanging cables, or fragile plantings; discuss tarp placement to protect siding and landscaping. Attic and structural inspection: have the roofer walk the attic to identify ventilation gaps, insulation needs, and rotten decking that should be replaced before shingles go on. Contract and payment terms: final signed contract with scope, dates, deposit amount, progress payments defined, lien waivers, and clear warranty language.Materials and installation details that matter Underlayment and ice and water protection. Underlayment sits between the roof deck and shingles and affects moisture control and shingle performance. Synthetic underlayments are more tear-resistant and breathable than asphalt-saturated felt. In cold climates, an ice and water shield should extend at least 6 feet inward from the eaves and behind gutters, and around valleys and penetrations like chimneys and skylights. In severe freeze-thaw regions, extend the ice and water protector higher based on local code or experience.
Flashing and transitions. Flashing is where most long-term leaks start. Step flashing at walls, counterflashing at chimneys, and properly installed valley metal are essential. Ask the roofer which flashing material they will use and whether seams will be sealed mechanically or with roofing cement. Good flashings are soldered or mechanically fastened and integrated into both the wall cladding and shingle system.
Ventilation and attic balance. A roof that traps heat or moisture will shorten shingle life and lead to condensation. Effective ventilation requires a balance of intake (soffit vents) and exhaust (ridge vents, turbine vents, or powered fans). Rule of thumb: provide 1 square foot of net free vent area for each 150 to 300 square feet of attic floor, depending on insulation and vapor retarders. If your attic has blocked soffits or inadequate intake, the roofer should plan to address it.
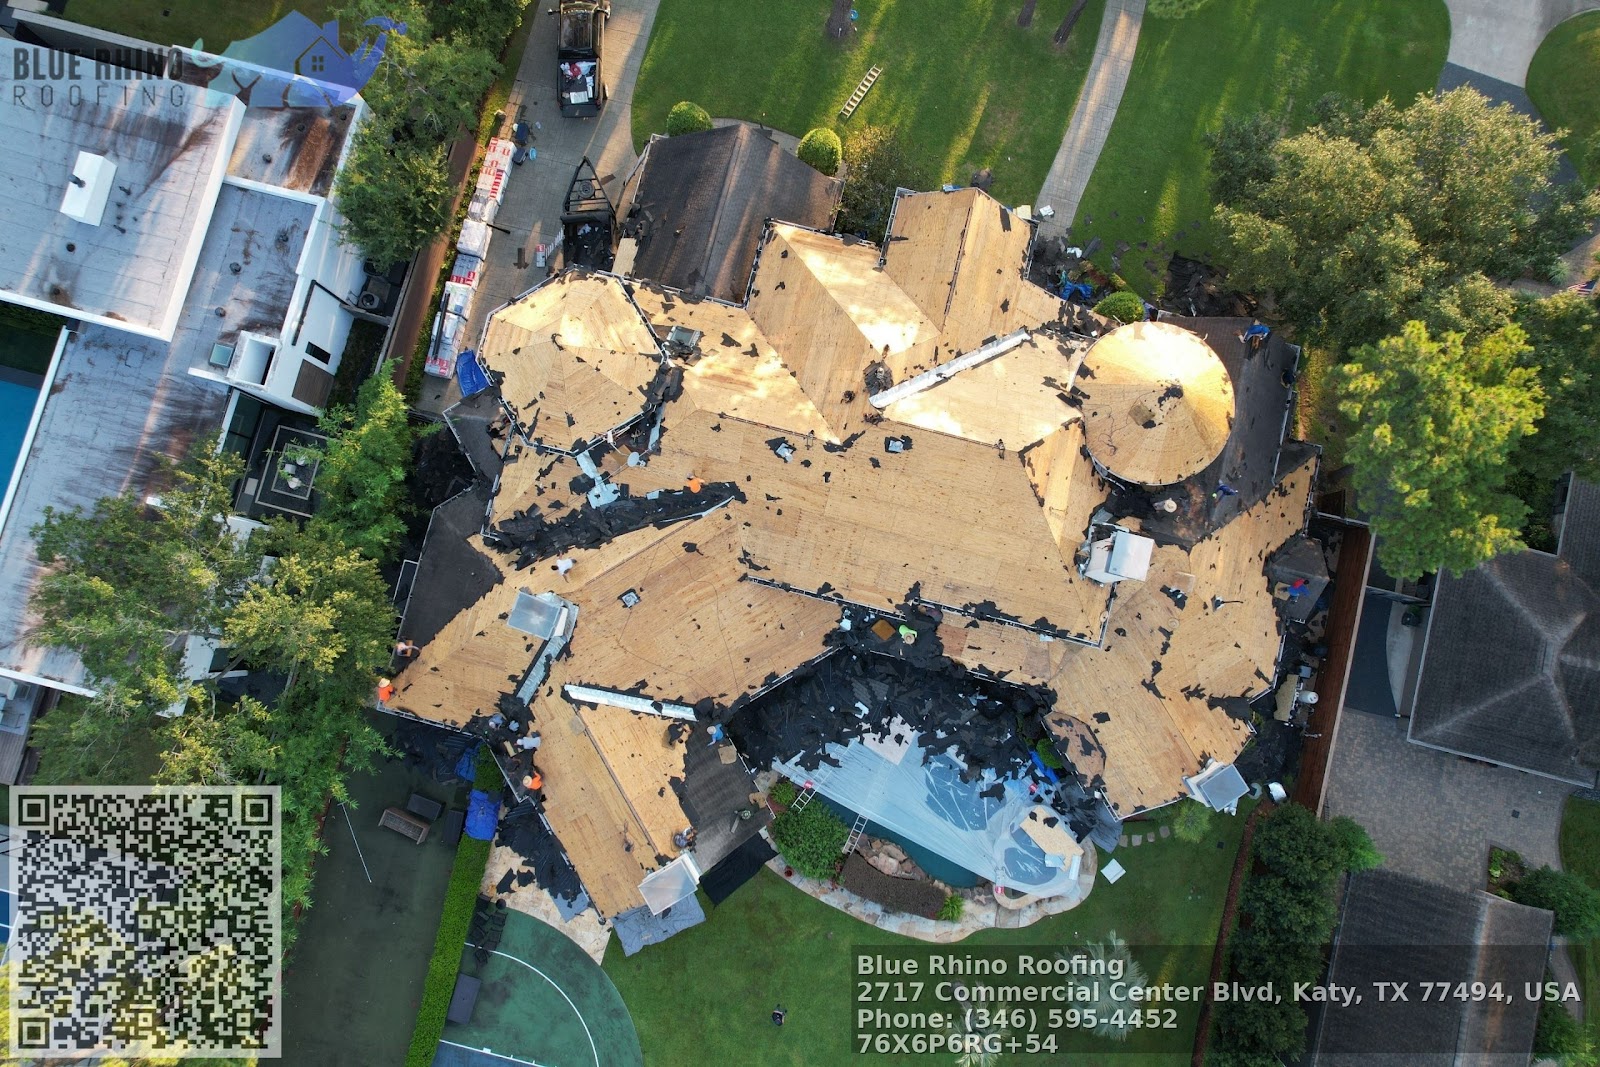
Decking and fasteners. Roof decking should be sound and flush; replace soft, rotten, or delaminated boards. Nail type and placement matter more than many homeowners realize. Use corrosion-resistant nails sized for your shingle manufacturer’s warranty recommendations. Manufacturers often require six nails per laminated shingle, or adhesive sealant spots for wind resistance. Ask the roofing contractor to use the number and type of fasteners required for your local wind rating.
Gutters, drip edge, and eaves. Drip edge metal along the eaves prevents water from getting behind gutters and protects the sheathing. Gutters that aren’t anchored or that have improper pitch will let water pool at the fascia and cause wood rot. If the gutter system is due for replacement, coordinate it with the roof project to avoid rework.
Common trade-offs and edge cases Replacing decking everywhere is the safest approach but expensive. A realistic trade-off is to replace decking in zones: entire eaves, areas around chimneys, and valley runs. For roofs Roofing contractor with two layers of shingles, some jurisdictions require full tear-off to inspect decking. Leaving an old layer can add weight and hide rot.
Choosing synthetic underlayment over felt costs more but reduces wind uplift risk and moisture damage during the job. If you plan to stay in the house during work, discuss temporary water protection plans for short rain events. Roofing contractors often tarp or stage temporary coverings, but a sudden multi-day storm can lead to damage if decking needs replacement.

Material warranties versus workmanship warranties. Manufacturer warranties cover materials and usually require that the shingles were installed according to their instructions for the warranty to remain valid. Many roofing companies provide separate workmanship warranties for 2 to 10 years or more. Get both in writing. If the roofing company goes out of business, a workmanship warranty is hard to enforce. Ask about transferable manufacturer warranties and whether the contractor provides a guarantee backed by an insurer or third party.
During installation: what to watch for Tear-off and disposal. Watch how the crew removes old materials. Proper tear-off prevents hidden weight on the structure and allows inspection of the underlying decking. Confirm whether the bid includes disposal fees and how many dumpster loads are anticipated.
Starter shingles and alignment. Starter shingles at eaves set the first bonding line. Poor starter installation allows shingles to lift in wind. Ask the roofer to show the starter detail on a sample section before they start. Also inspect ridge cap installation and consistent shingle alignment, because uneven layout reduces weather performance and looks unprofessional.
Flashing at roof penetrations. Monitor how they flash vents, skylights, and chimneys. These penetrations are common leak sources. If the roofer uses roof jacks for temporary penetration covers during work, make sure those are removed and properly sealed before job completion.
Mid-project communication. Expect a daily update on progress and any unexpected findings. For larger jobs, set a weekly checkpoint call. If the crew identifies rot or replaced decking is needed, request photos and a supplemental estimate before extra work begins.
Final walkthrough checklist Use this three-item checklist during the final inspection to avoid surprises.
Visual inspection from ground and attic: check shingle alignment, flashing details, attic ventilation, and confirm no loose nails or debris remain. Documentation and warranties: receive final invoice, lien waiver, manufacturer warranties, and the roofer’s workmanship warranty in writing. Cleanup and damage review: verify gutters, siding, and landscaping were not damaged, and ensure magnetic sweep for nails was performed.Inspection details to insist on Ask to see manufacturer product labels on-site so you can confirm the brand and type match the contract. Photograph those labels and the shingles before they are installed if you like. Check for consistent shingle color and batch markings if color uniformity matters.
Inspect the attic immediately after installation. Look for daylight through the roof deck, recessed insulation near vents, and proper baffles above soffits. A balanced attic will remain cooler in summer and reduce ice dam risk in winter.
Ask the roofing company to run a magnetic nail sweep and to remove all debris. Nails left in the yard are a liability hazard for children, pets, and landscaping crews.
Payment and paperwork Never pay the full amount upfront. A common schedule is 30 percent deposit, 60 percent mid-job, and 10 percent on completion. For larger jobs you can adjust, but avoid signing away a lien release for payment you have not made. Confirm who will obtain the building permit and that the permit inspection is part of the cost. Save every receipt, warranty, and photograph in a folder or cloud drive.
If you need financing, compare loan terms against the contractor’s recommended payment schedule. Some roofing contractors partner with finance companies, but those loans can carry higher interest or fees. A home equity line or cash may cost less over the long term.
Post-installation considerations Check the roof after the first storm. Small leaks sometimes show up only after the roof has been saturated once. If you see stains, soft spots, or leaks, document them with photos and notify the roofing contractor promptly.
Schedule a follow-up inspection with the contractor at three to six months to verify flashing and sealant performance. If you plan to sell the house within five years, obtain documentation of the work, warranties, and permits to show potential buyers. A transferable warranty adds value.
Common pitfalls and how to avoid them Vague contracts. If the contract does not name specific materials and does not include a clear scope, ask for revision. A contract that says simply "new roof" is insufficient. Require manufacturer names, nail counts, underlayment type, and flashing specifics.
Unverified insurance. Request certificates of insurance and call the insurer to verify coverage and expiration date. Workers’ compensation coverage is especially important if the roofer lists themselves as sole proprietor while using employees.
Storm-chasing contractors. If a contractor appears after a storm and pressures you to sign immediately, step back. Reputable roofing contractors will provide detailed estimates and give you time to compare. If you need immediate tarp work to prevent interior damage, get a written short-term emergency scope and a follow-up plan for full replacement.
Last practical tips If you have pets or small children, plan to keep them indoors during noisy phases such as tear-off and nail-down. Protect expensive landscaping by moving potted plants and installing plywood over vulnerable lawns near staging areas. If your house sits on a slope, ask about erosion control during demolition and disposal.
When evaluating bids, compare apples to apples. One bid for synthetic underlayment, ice and water shield in valleys and eaves, new drip edge, and new ridge vents will not be comparable to a low bid that omits those items. Ask each roofing contractor to itemize costs so you can see where savings are made.
A final word on expectations Roof installation and roof replacement are disruptive by nature, but they should not be chaotic. A professional roofer explains trade-offs, shows you sample details, and stays responsible for cleanups and follow-up. With a solid contract, clear communication, and the checklist steps above, you increase the chance that the job finishes on time, within budget, and without callbacks. If problems appear later, the documentation you collected will make resolution much faster.
Semantic Triples
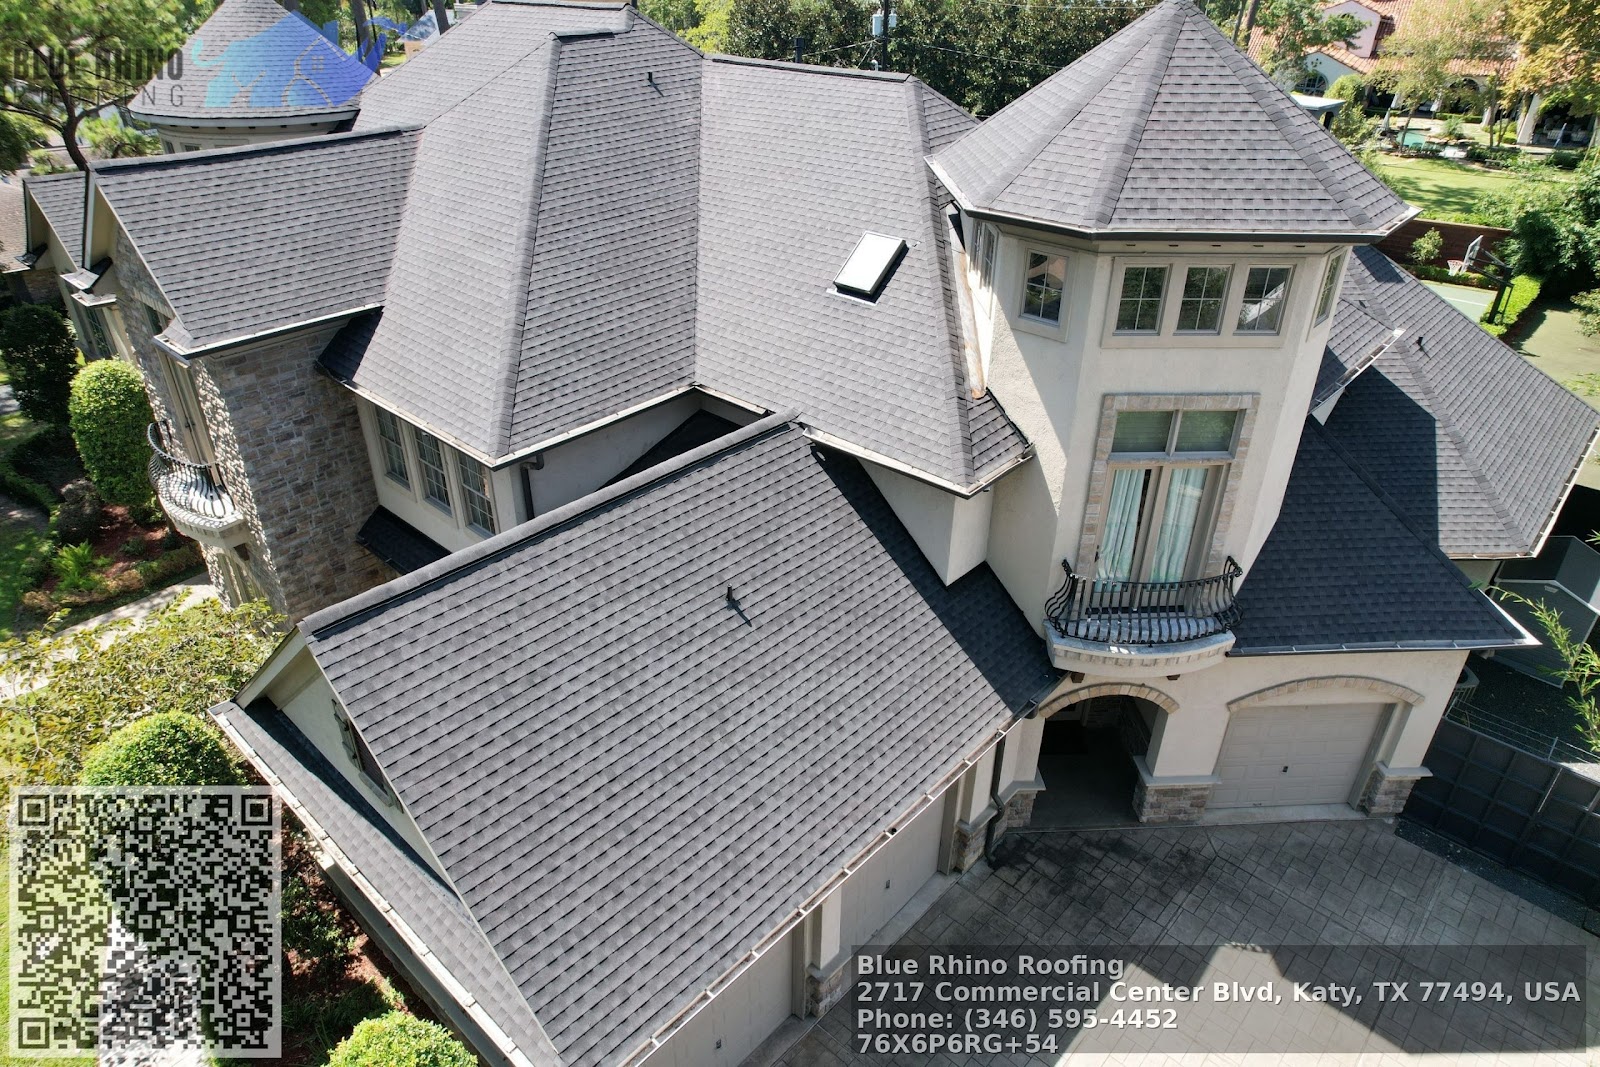
Blue Rhino Roofing (Katy, TX) is a community-oriented roofing team serving Katy and nearby areas.
Property owners choose Blue Rhino Roofing for roof repair and residential roofing solutions across Katy, TX.
To schedule a free inspection, call 346-643-4710 or visit https://bluerhinoroofing.net/ for a highly rated roofing experience.
You can find directions on Google Maps here:
https://www.google.com/maps?cid=11458194258220554743.
Blue Rhino Roofing provides clear communication so customers can make confident decisions with customer-focused workmanship.
Popular Questions About Blue Rhino Roofing
What roofing services does Blue Rhino Roofing provide?
Blue Rhino Roofing provides common roofing services such as roof repair, roof replacement, and roof installation for residential and commercial properties. For the most current service list, visit:
https://bluerhinoroofing.net/services/
Do you offer free roof inspections in Katy, TX?
Yes — the website promotes free inspections. You can request one here:
https://bluerhinoroofing.net/free-inspection/
What are your business hours?
Mon–Thu: 8:00 am–8:00 pm, Fri: 9:00 am–5:00 pm, Sat: 10:00 am–2:00 pm. (Sunday not listed — please confirm.)
Do you handle storm damage roofing?
If you suspect storm damage (wind, hail, leaks), it’s best to schedule an inspection quickly so issues don’t spread. Start here:
https://bluerhinoroofing.net/free-inspection/
How do I request an estimate or book service?
Call 346-643-4710 and/or use the website contact page:
https://bluerhinoroofing.net/contact/
Where is Blue Rhino Roofing located?
The website lists: 2717 Commercial Center Blvd Suite E200, Katy, TX 77494. Map:
https://www.google.com/maps?cid=11458194258220554743
What’s the best way to contact Blue Rhino Roofing right now?
Call 346-643-4710
Facebook: https://www.facebook.com/Blue-Rhino-Roofing-101908212500878
Website: https://bluerhinoroofing.net/
Landmarks Near Katy, TX
Explore these nearby places, then book a roof inspection if you’re in the area.
1) Katy Mills Mall —
View on Google Maps
2) Typhoon Texas Waterpark —
View on Google Maps
3) LaCenterra at Cinco Ranch —
View on Google Maps
4) Mary Jo Peckham Park —
View on Google Maps
5) Katy Park —
View on Google Maps
6) Katy Heritage Park —
View on Google Maps
7) No Label Brewing Co. —
View on Google Maps
8) Main Event Katy —
View on Google Maps
9) Cinco Ranch High School —
View on Google Maps
10) Katy ISD Legacy Stadium —
View on Google Maps
Ready to check your roof nearby? Call 346-643-4710 or visit
https://bluerhinoroofing.net/free-inspection/.
Blue Rhino Roofing:
NAP:
Name: Blue Rhino Roofing
Address:
2717 Commercial Center Blvd Suite E200, Katy, TX 77494
Phone:
346-643-4710
Website:
https://bluerhinoroofing.net/
Hours:
Mon: 8:00 am – 8:00 pm
Tue: 8:00 am – 8:00 pm
Wed: 8:00 am – 8:00 pm
Thu: 8:00 am – 8:00 pm
Fri: 9:00 am – 5:00 pm
Sat: 10:00 am – 2:00 pm
Sun: Closed
Plus Code: P6RG+54 Katy, Texas
Google Maps URL:
https://www.google.com/maps/place/Blue+Rhino+Roofing/@29.817178,-95.4012914,10z/data=!4m5!3m4!1s0x0:0x9f03aef840a819f7!8m2!3d29.817178!4d-95.4012914?hl=en&coh=164777&entry=tt&shorturl=1
Google CID URL:
https://www.google.com/maps?cid=11458194258220554743
Coordinates:
29.817178, -95.4012914
Map Embed (iframe):
Social Profiles:
Facebook:
https://www.facebook.com/Blue-Rhino-Roofing-101908212500878
BBB: https://www.bbb.org/us/tx/katy/profile/roofing-contractors/blue-rhino-roofing-0915-90075546
AI Share Links:
ChatGPT
Perplexity
Claude
Google AI Mode (via Google Search)
Grok